
In case of an emergency, Apple have created a place where you can add all of your critical information to be accessed by anyone trying to help you.
The information can also be handy if you simply lose your mobile device. If you have emergency contacts in your medical ID, someone who finds your device can access this information to return your phone to you.
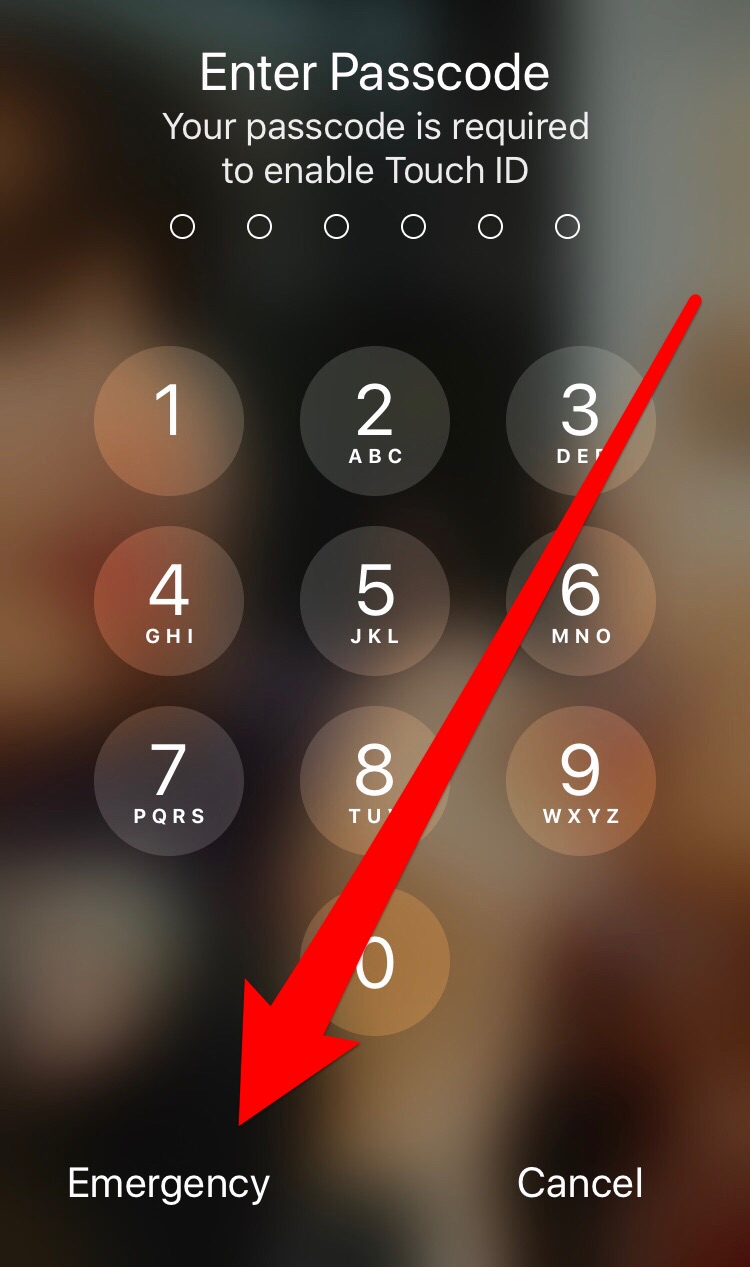
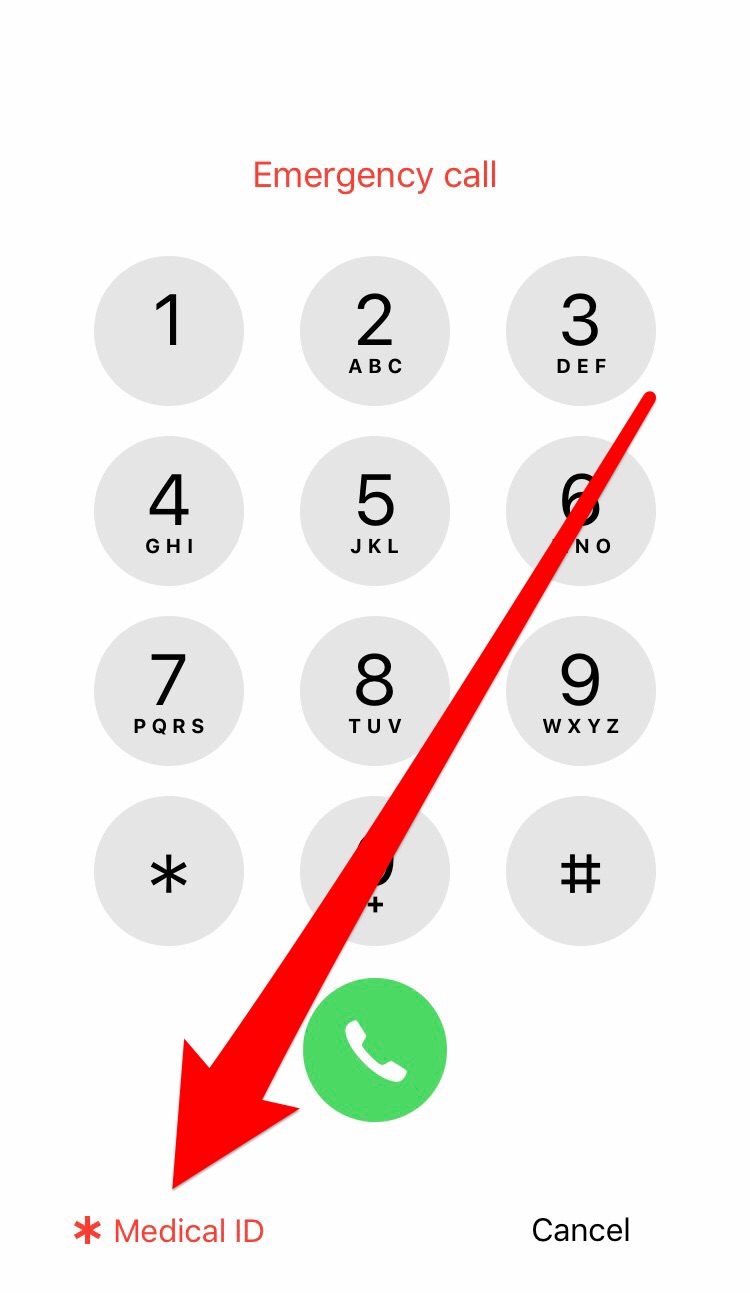
..the problem is not many people have it set up properly and hardly anyone knows how to access the information.
Setting it up is easy when you know how. You can just follow the easy steps below.
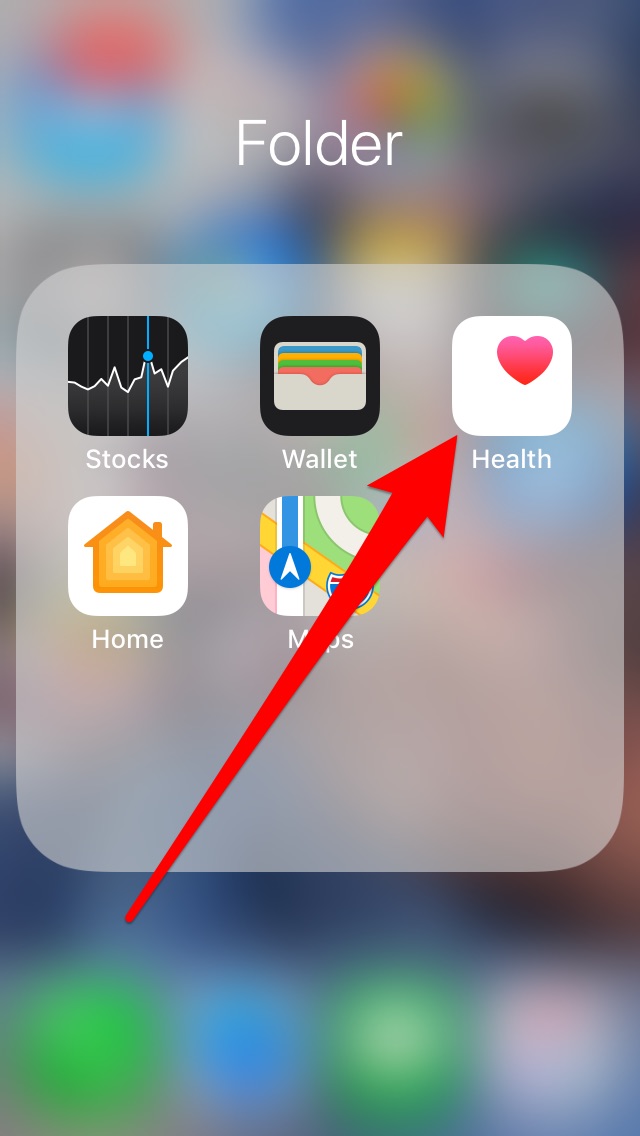
First you need to find the HEALTH APP on your iPhone and make sure that your emergency contacts and medical information can still be accessed when your phone is locked! …because your mobile phone holds A LOT of information about you and you MUST keep it locked at all times! 😉
Step 1:
OPEN the HEALTH APP on your iPhone.
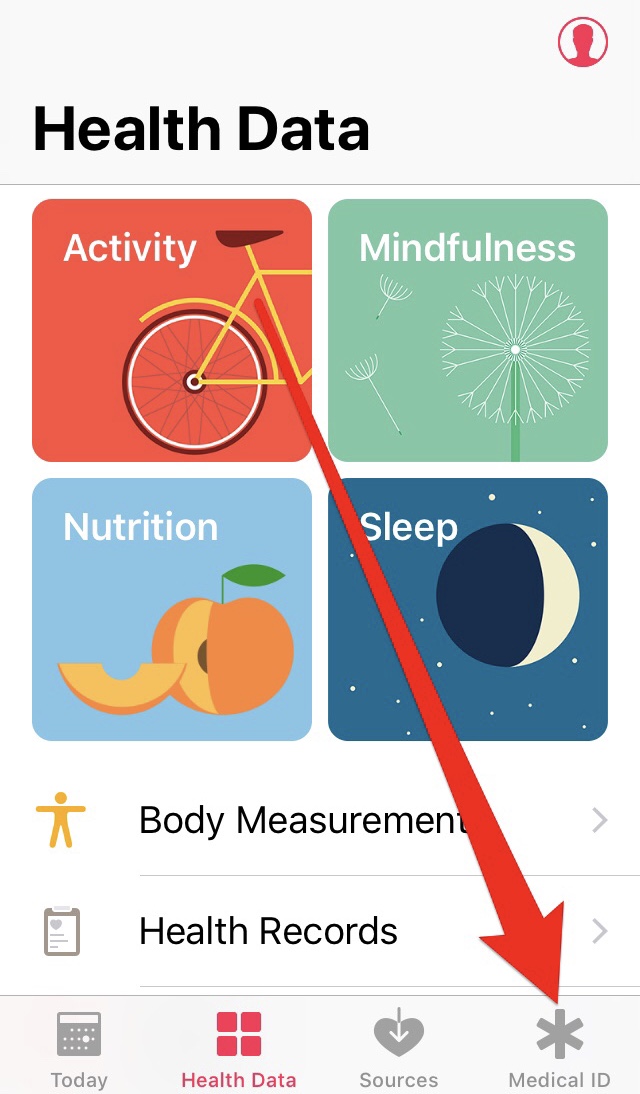
Step 2:
TAP the MEDICAL ID option at the bottom left of the screen.
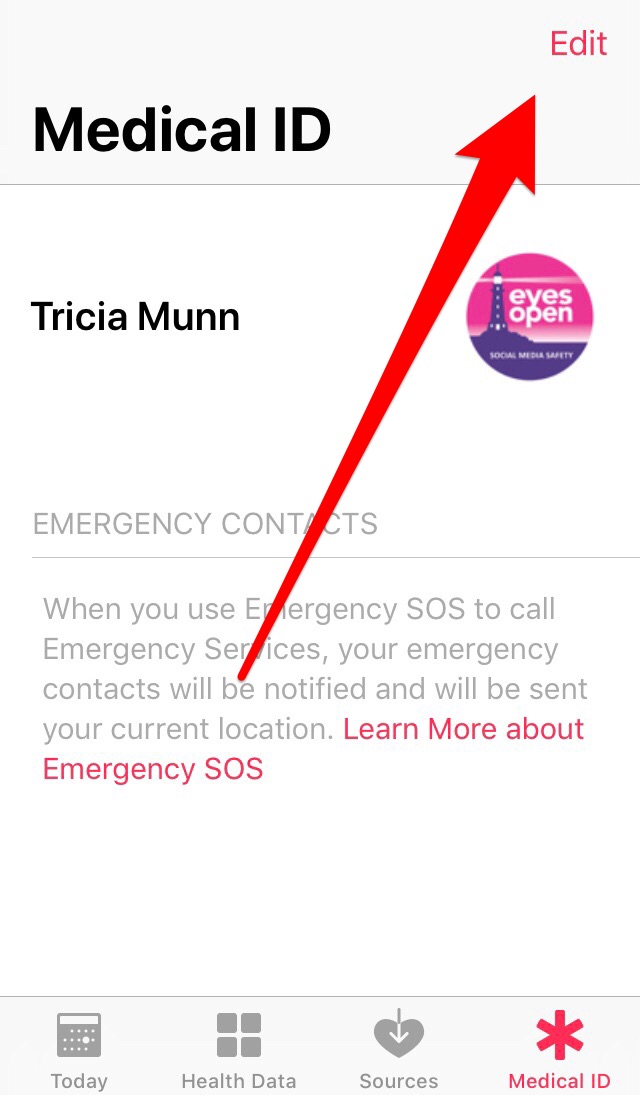
Step 3:
TAP the EDIT option at the TOP RIGHT of the screen.
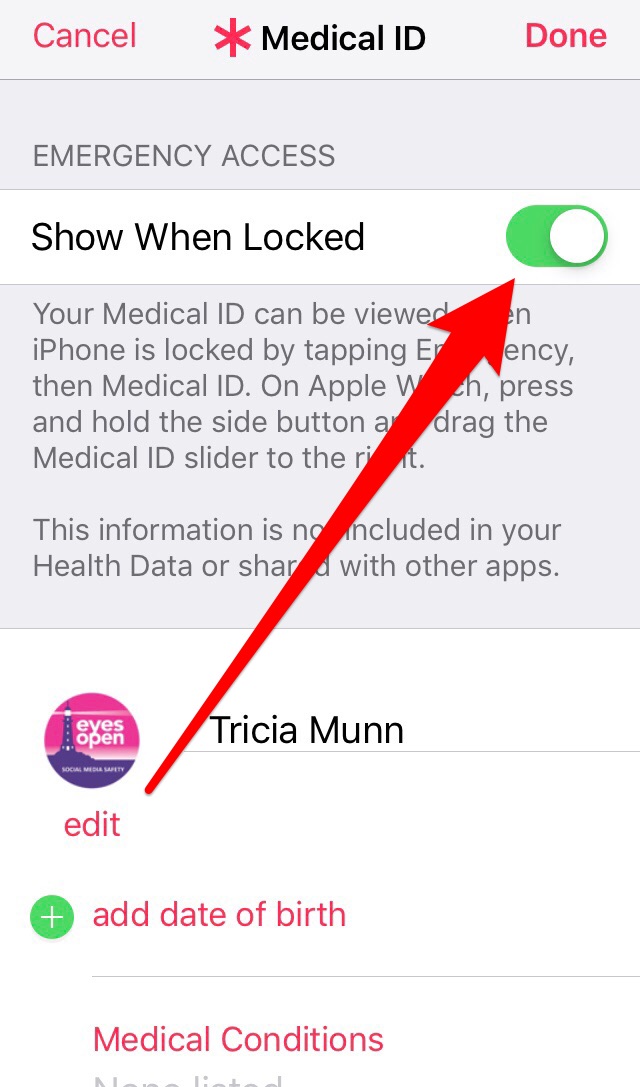
Step 4:
TURN ON the SHOW ON LOCKED option, to ensure that people trying to help you are able to access the information even if you are not able to unlock your phone for them.
Then you need to add your medical information… but make sure that setting this up isn’t going to put you at risk in other ways. 👿
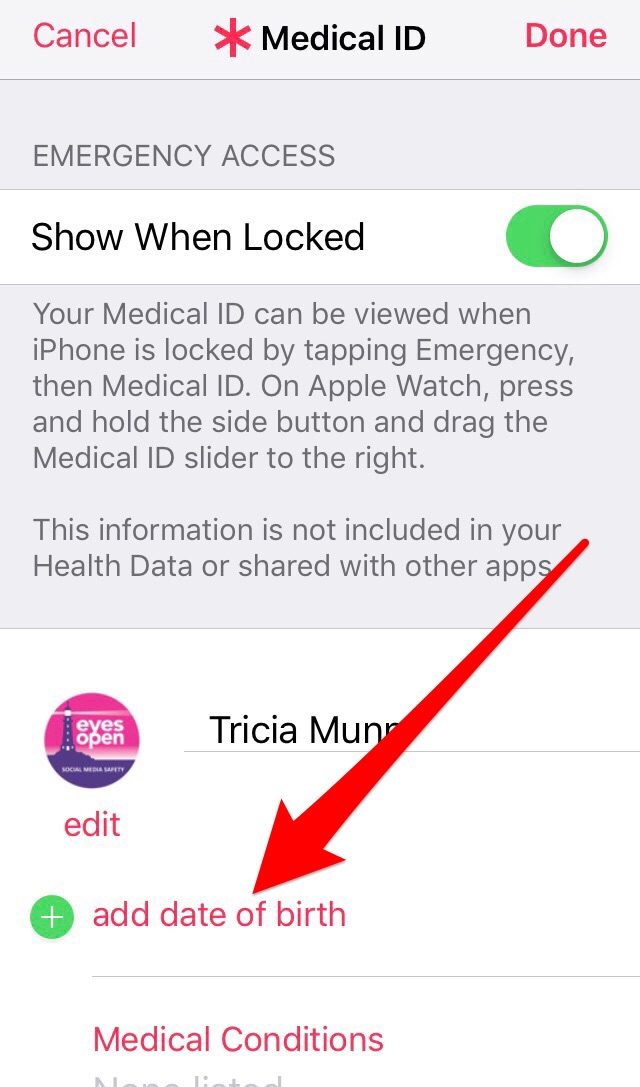
Step 5: (SAFETY TIP)
If you add your Date of Birth here anyone who has access to your phone will be able to see this information. It could put you at risk of Identity Theft. Our suggestion is that you instead ensure that emergency contacts are reliable options so that they can inform medical staff of your DOB when contact is made.
(aka don’t add date of birth) 🙂
Step 6:
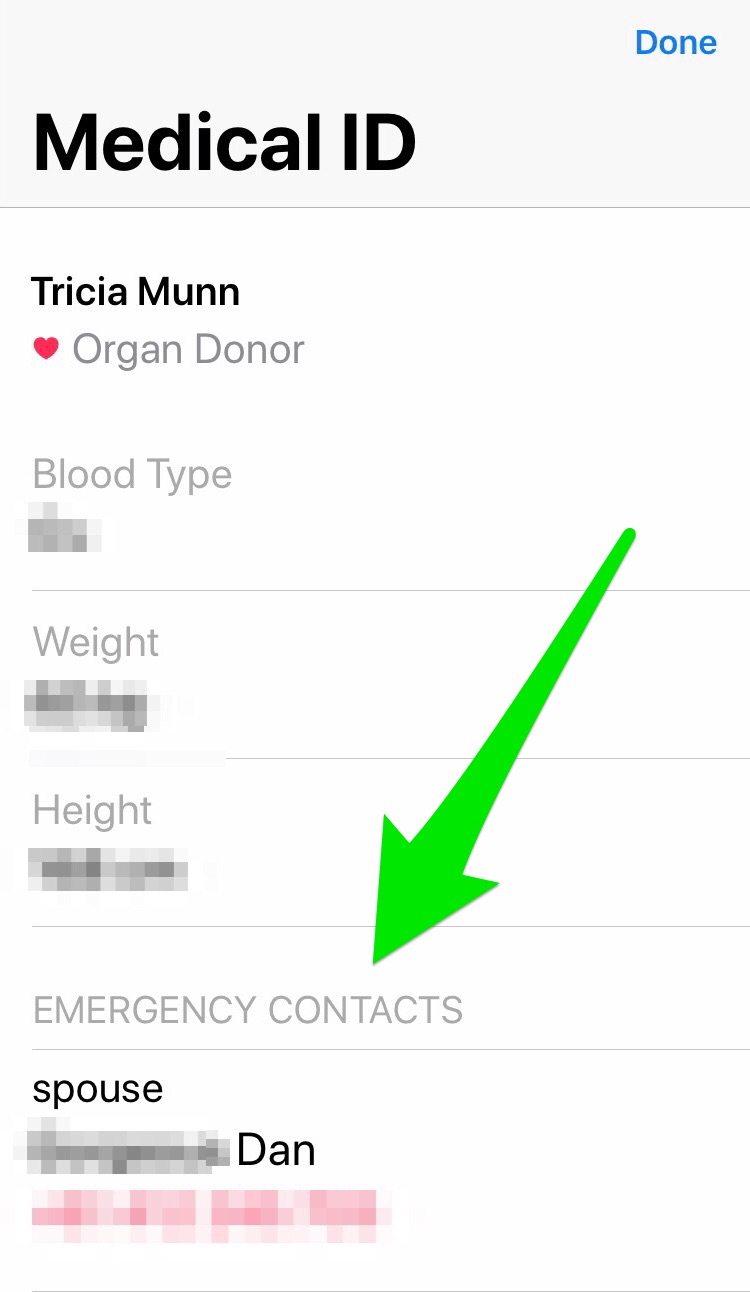
Make sure you add all information that is CRITICAL during an emergency.
Your emergency contacts information will be available for people to call if you lose your phone and in a situation where you initiate contacting emergency services through the EMERGENCY SOS option on your phone, notification of your distress and your location details will be sent to the people listed as your emergency contacts.
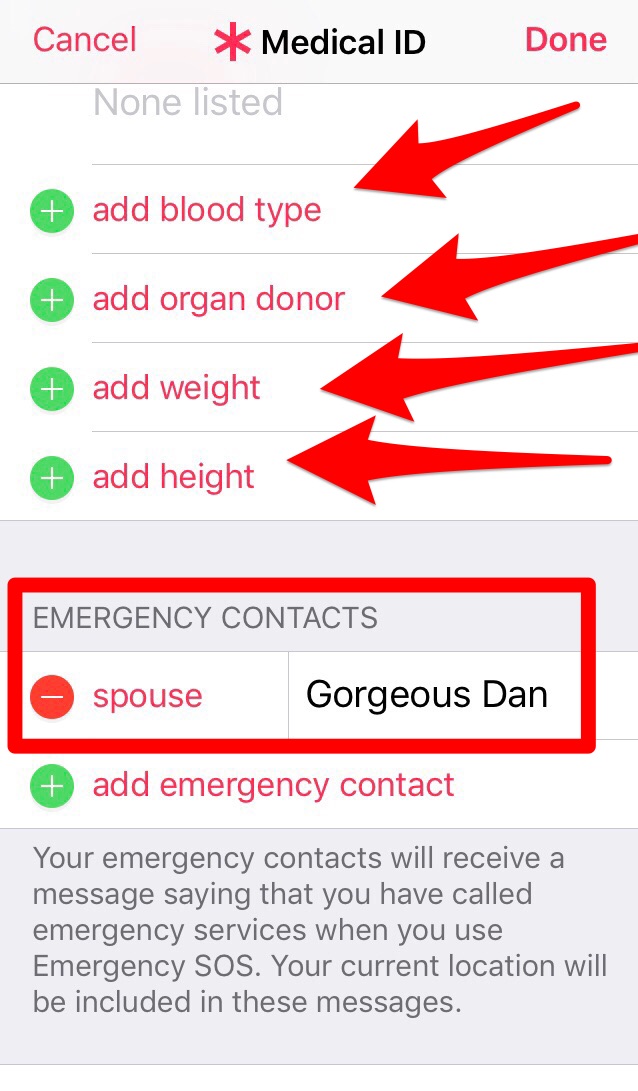
Setting up how you access your EMERGENCY SOS feature and what will happen when you activate emergency calls using EMERGENCY SOS will ensure that the information you have added is accessible and able to be used by people trying to help you. (or people who find your phone and wish to return it)
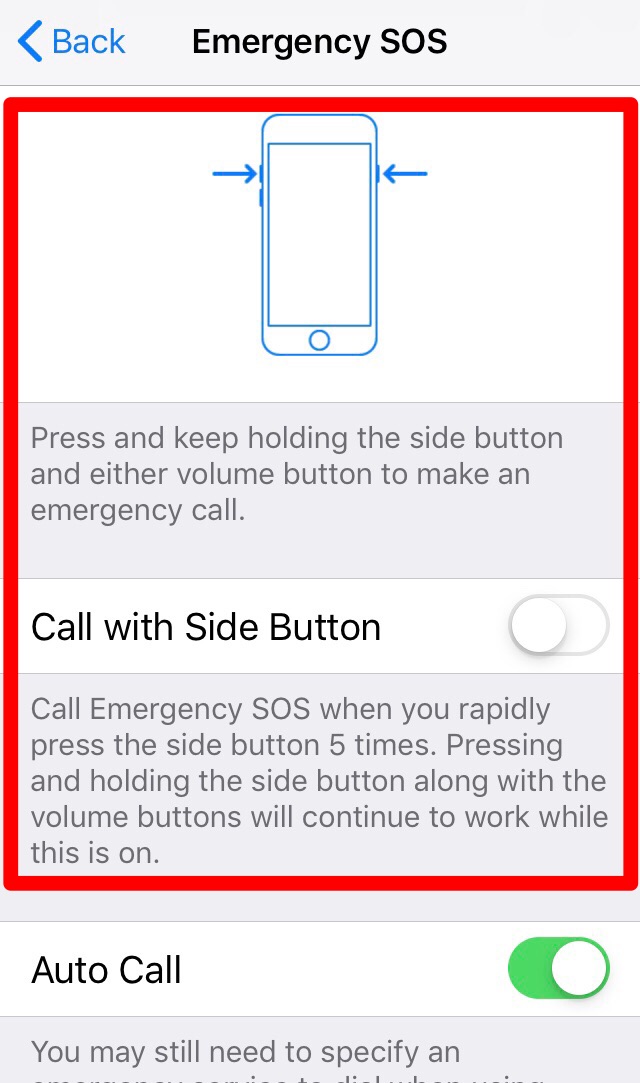
Step 7:
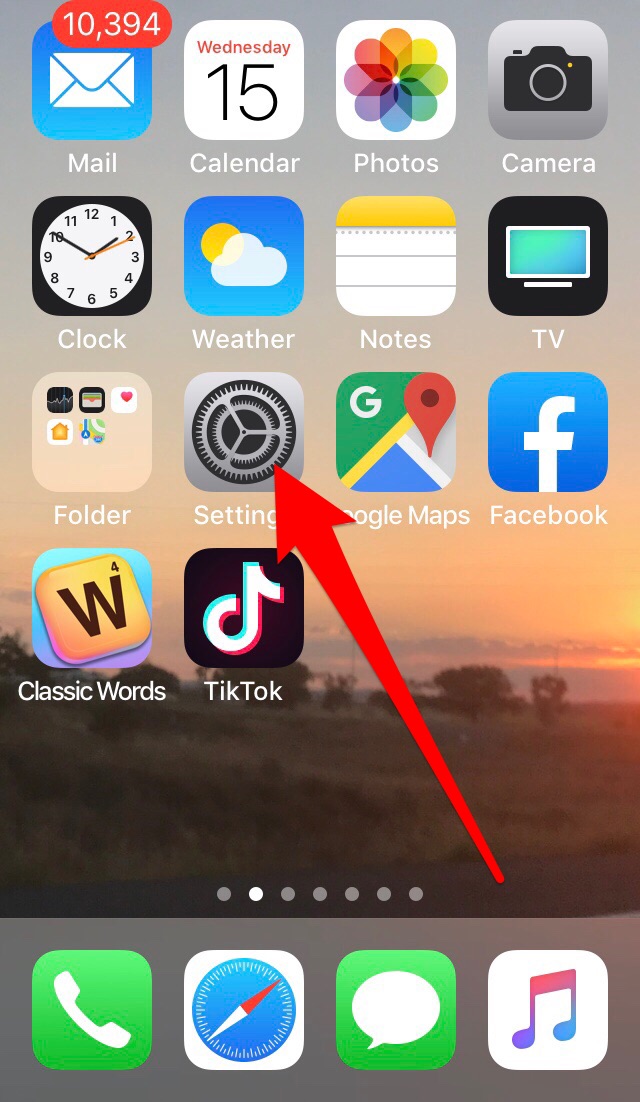
You also need to set up easy access to your emergency information in the settings of your iPhone.
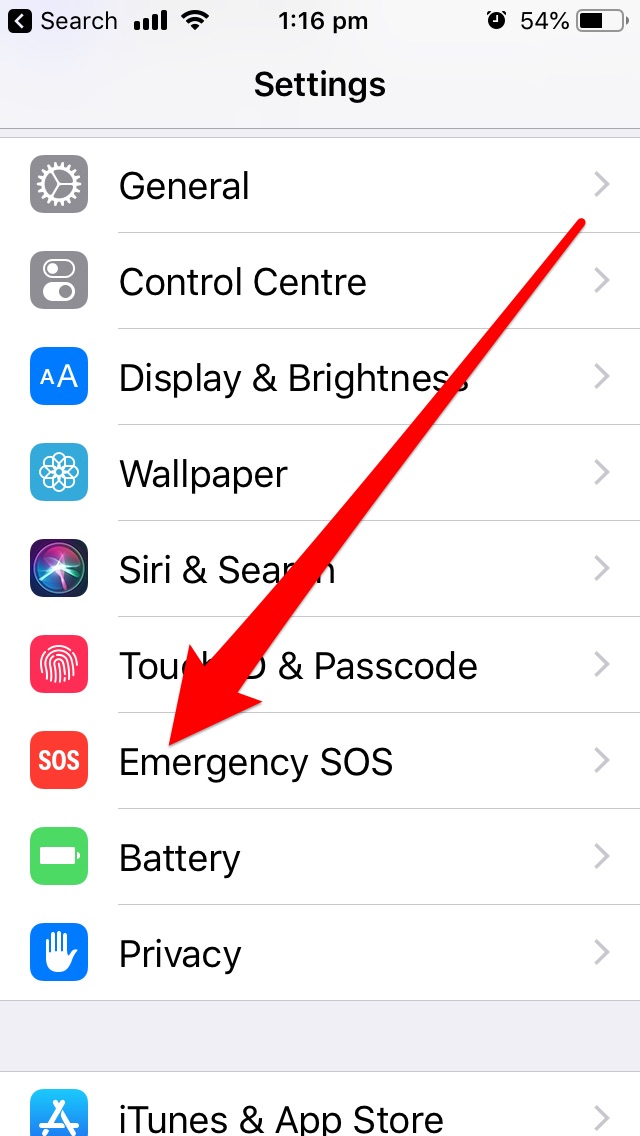
Step 8:
SCROLL down through your settings and TAP EMERGENCY SOS.
Step 9:
Make sure you TURN ON the CALL WITH SIDE BUTTON option.
(this ensures that no matter what option the person trying to help you knows how to use, it is available on your phone. This being activated also gives you an option to sound a very loud warning alarm while your phone is contacting emergency services. Using this could be enough to scare a person who was threatening you.)

Step 10:
Choose whether you want to TURN ON the COUNTDOWN SOUND option.
See information below to assist you with making your decision.

Information: If you have an older iPhone you may ONLY have the option to activate the EMERGENCY SOS call for help by using the 5 quick button press option on the power/sleep button of your iPhone.
Activating the emergency call in this way will also activate the countdown sound, which will draw attention to you and having this activated could assist to make someone stop hurting you or alternatively it could put you at risk of further harm.
In this case of having an OLDER PHONE – we suggest it may be safer to have the COUNTDOWN SOUND turned OFF.
On newer iPhones you have the option to activate the EMERGENCY SOS feature in two ways.
The first is by the five quick clicks of the POWER/SLEEP option.
The second is by PRESSING AND HOLDING the POWER/SLEEP button AND a VOLUME button AT THE SAME TIME. Activating the EMERGENCY SOS in this way WILL NOT ACTIVATE THE WARNING ALARM. (countdown sound)
Therefore, if you have a newer iPhone it is a good idea to TURN ON the COUNTDOWN SOUND and have both options available to you in an emergency.
You need to be clear about which activation plays the warning sound though so you can make the best choice for yourself at the time. Remember a loud alarm may be enough to frighten someone attacking you. It could also make the situation worse.
Finally, make sure that your emergency contacts will be notified and sent your location if your EMERGENCY SOS feature is activated on your phone.
…before you go, check what options you have to activate the EMERGENCY SOS on your phone, and practice all options in case you are trying to help someone else in the future!
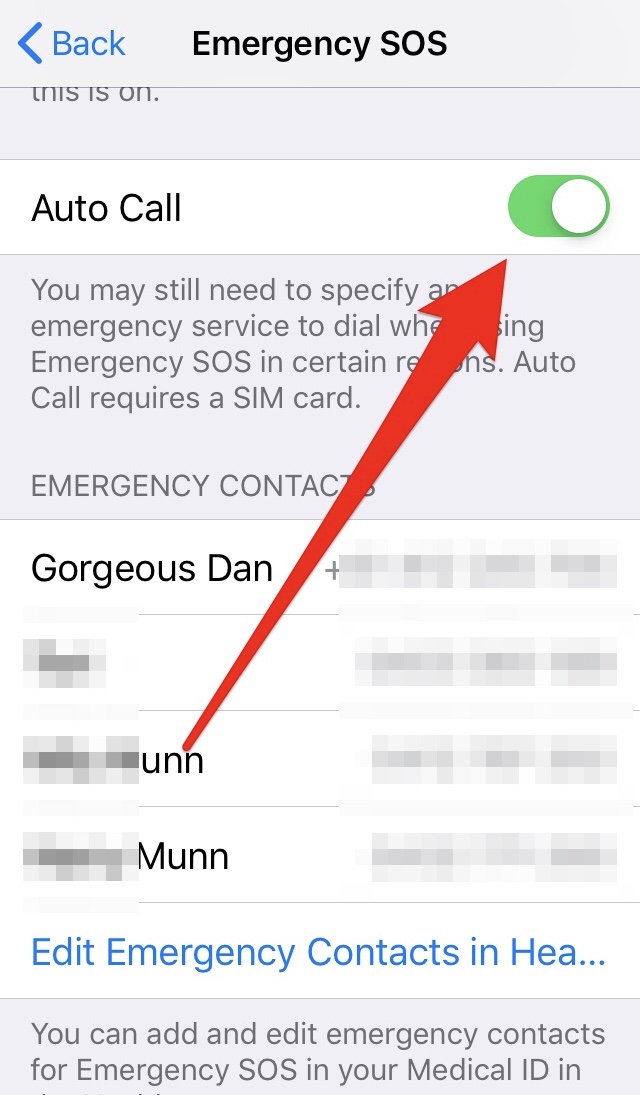
Step 11:
Make sure you have the AUTO CALL option TURNED ON, so that your emergency contacts are notified and sent your location if you have reason to activate the EMERGENCY SOS feature on your phone.
Step 12:
CHECK and PRACTICE which options are available for activating EMERGENCY SOS on your phone.
Note: If you are helping someone else or using someone else’s phone you may only have the option of using the FIVE QUICK PRESSES on the SLEEP/POWER button.
Let’s hope that you never need to use this feature on your phone, but it’s definitely worth having set it up in case you do!
Written by: Trish

